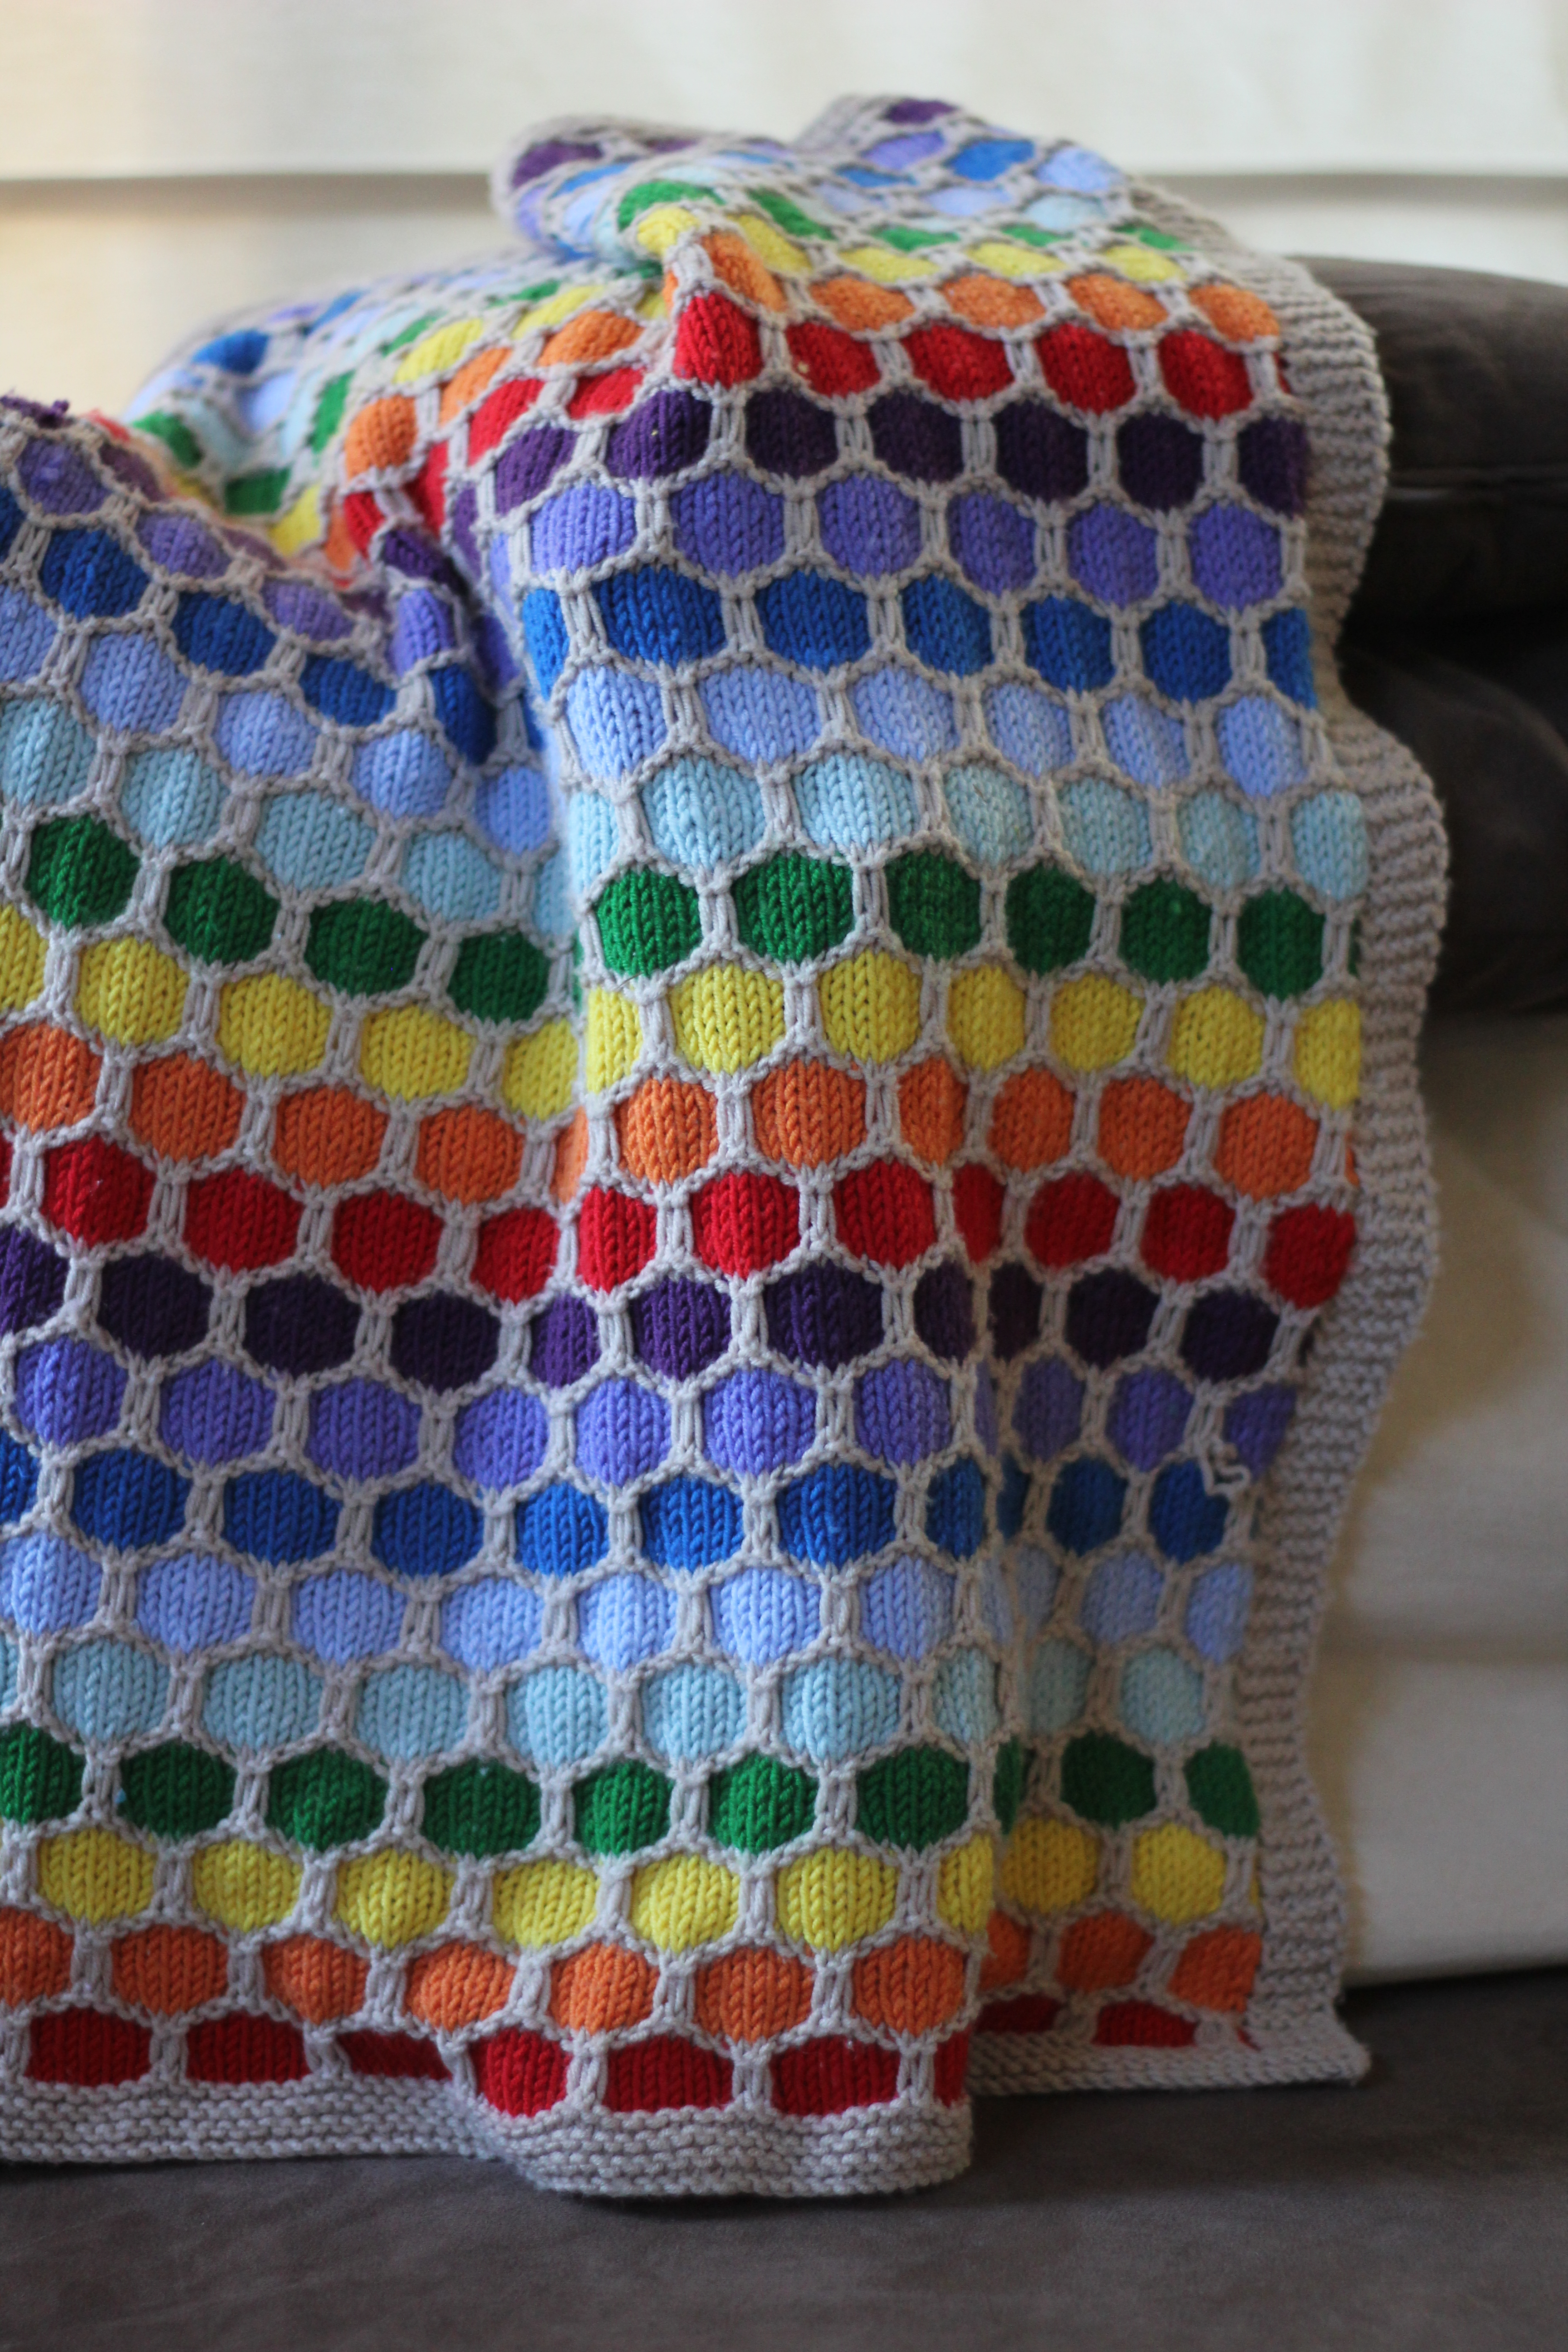
It’s a pretty little blanket. Perfect for keeping W’s knees warm in the car and in the pram.
Pattern: Honeycomb Stroller Blanket by Terry Kimbrough, Susan Leitzsch and Lucie Sinkler
Source: Ravelry
Price: Free!!
Yarn: 8ply merino in lots of different colours
Needle: 4.5mm
I must acknowledge significant inspiration from Duschinka on Ravelry who made this rather drab looking pattern into something amazing! This pattern is surprisingly easy. The honeycombs are made by slipping two stitches from the neutral coloured row while knitting the band of colour and then knitting them again as you reach the next rows of neutral colour… if that makes sense.
Besides making honeycombs, the other new skill I learned doing this knit was twisting two colours together so that I could knit the border which had a vertical edge up either side without getting a gaping hole. This is called intarsia apparently. There’s a little video tutorial on it here.
Everywhere I go with this blanket – which is everywhere as it’s a favourite of W’s – I get compliments and assertions that I should make more and sell them on Etsy. Unfortunately, I’m not the world’s fastest knitter so to make it worth my while each blanket might need to retail for $500. The other drawback would be that it would get in the way of trying something new! Which is indeed one of my favourite things about knitting.
That being said, I am starting to think about making a new honeycomb blanket, maybe in different shades of the same colour, maybe in blues or greens. But first, I must knit the yarn I already have. Wonder if I can make a funky spin on the honeycomb blanket from my stash scraps…hmmm?
Pearls:
- Knit the border as you go – I did this by knitting seven rows of garter stitch (114 stitches) to start, then knitting 7 stitches at the beginning and end of each row to form the borders up the sides then finishing with a further 7 rows of garter at the end.
- Use the scraps from this project to make lots of rainbow gear – – nothing cuter than a little rainbow hat and romper suit! The hat is from this book and the romper suit was a slightly imperfect variation of this pattern. I knit with smaller needles and a smaller ply yarn in an attempt to make a newborn size from a 3 months size pattern… resulted in a very small outfit that W got very little use out of. Which is a shame. Super cute.
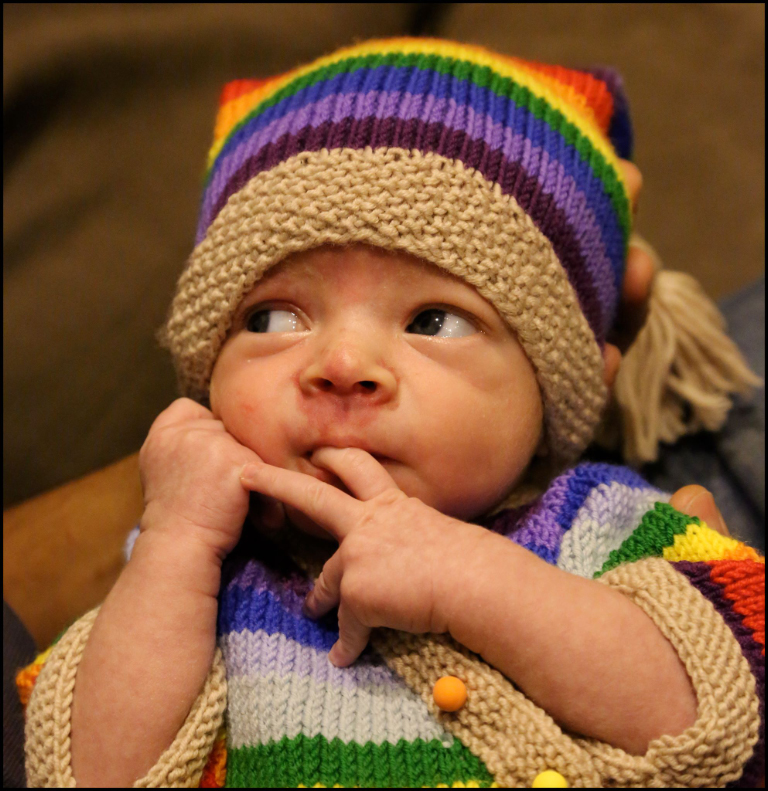
I made this hat and romper from the blanket scraps. The romper was gorgeous but a bit of a failure (too small to get more than two wears out of it) and the hat was a failure due to the massive head W was born with. I think he wore it once!
20 Dec 2014
Addit: Here’s a picture of the wrong side to show the intarsia, sewn in ends and border a bit better.


Dear,
I loved how you have made this rainbow version of the honeycomb pattern by raverly which I was also able to download.but I do not know how:
A. One deals with the ends of each color when introducing it or ending it.
B. Does one work each color and the side boarders and the ends of the yarns.
Could you, kindly explain in more detail how to begin and proceed.
Thank you in advance.
Ea
LikeLike
Hi Eleni,
I simply tie the new colour to the old one at the start of the row and at the end of project I sew in the ends using this technique (http://newstitchaday.com/weaving-in-ends/) leaving a short tail on the wrong side of the work. For the border, I cast on in border colour (B) 114 stitches, knit seven rows (garter stitch), then on the first row of the first colour (C1), I knit 7 stitches in B, then knit 1 in C1, slip 2 as if to purl, knit 6 in C1, etc as per the pattern, then at the end of the row, join in B again and knit 7 stitches. For the next row, start with knit 7 in B, then twist B and C1 around each other before recommencing the pattern using C1 (i.e. purl 1, slip 2 as if to purl, purl 6, etc) and as you get to the other end, twist B and C1 around each other again before you knit the final 7 stitches in B. This technique of twisting the colours around each other is called intarsia (there’s a link to a video in my post) and it allows you to generate a vertical border without getting a hole between the border and the main blanket.
I hope this description is helpful! I’ll add a photo of the wrong side of the work to show you the edge and the sewn in ends. Happy knitting!!
LikeLike
Was there a link to download pattern?
LikeLike
You can find it here. http://lifestyle.howstuffworks.com/crafts/knitting/free-knitting-patterns-for-baby-blankets3.htm
LikeLiked by 1 person
I’m not sure you’ll see this bc it’s been years since you published it but I just want to make sure I’m understanding correctly, you use a 2nd ball or bobbin of the border color to do the intarsia up the sides? I think it will make more sense when I begin. Thank you so much for this pattern modification, I can’t wait to make it for my miracle rainbow baby after 7 consecutive losses 🙂
LikeLike
Hi 🙂 Yes – that’s right. You’ll need two balls (or a second bobbin) to do the two edges up the sides. Good luck! I still get comments on this blankets whenever it’s out and about… and have even spotted a few done the same way too which it pretty cool. I can’t take credit though, I was inspired by another version on Ravelry (mentioned in the blog post). Happy knitting!
LikeLike