Knitting Baby Stuff: Marguerite & Madeline

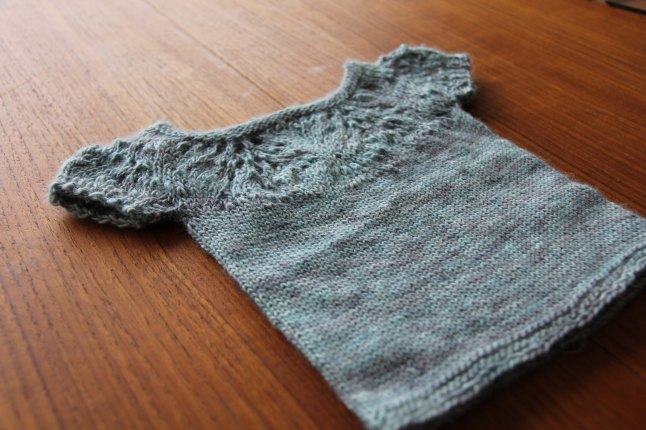
There’s an apparent baby boom going on among my friends at present so I’m in (yet another) flurry of knitting activity trying to make sure I have something for all the new arrivals. I was running a little bit behind schedule when this little lady made her entrance in such a hurry that she was (unexpectedly) delivered with help from her dad and 000 in the bathroom! Not that the dramatic (and fortunately safe) circumstances of her arrival are any excuse for my late knitting. She was actually right on time.
img_9932

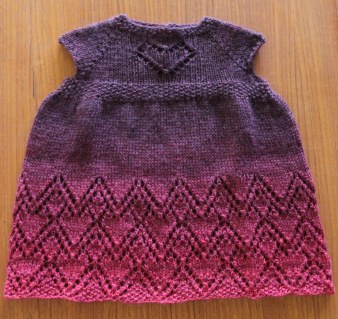
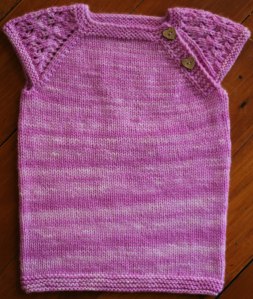
A relatively quick knit for a little girl who also likes to do things in a hurry.

So having knit old favourites recently, I decided to go with something new for this little lady.
img_9934

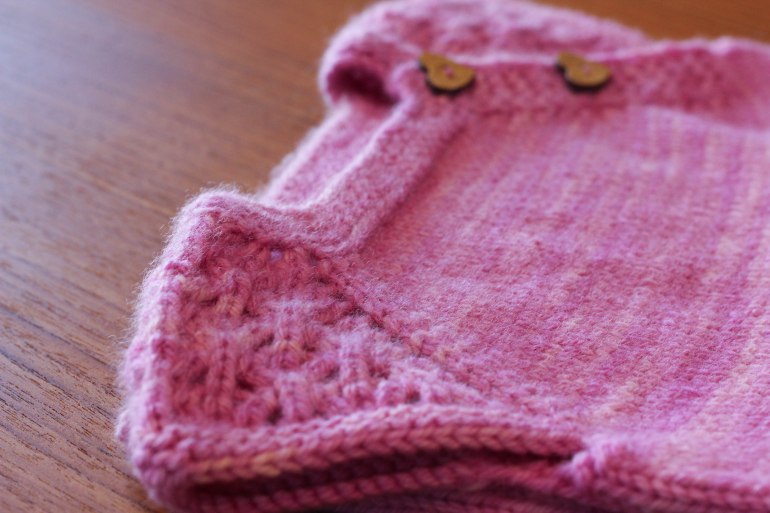
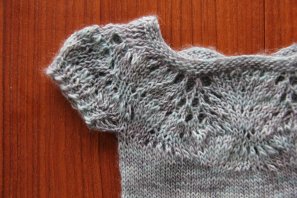
Skew-whiff lace.

Pattern: Marguerite by Helen Rose

Cost: $5 USD

Source: Ravelry download

Yarn: Madelinetosh Feather in Over the Ocean

Needle: 3.25mm and 4.5mm 16″ circular and 4.5mm DPNs

Before I get on to the pattern—which I’ll say now made me a little grumpy—the yarn I used for this is fast becoming a favourite. Delicate, soft and subtly shimmering colour. Having not known it existed a few months ago, I am becoming a firm fan of single ply yarn for anything light and soft.

So, while this is a sweet little lacy top which is very simple to make, some aspects of this pattern irked me and my perfectionistic tendencies and I’m not sure I’d make it again without making a few corrections.

My first gripe is that the lace repeat is not symmetrical. Instead of working ssk on one half of the repeat and then k2tog for the other side, as one would expect in a lace pattern, all the decreases are worked as k2togs. To me the whole thing looks a bit skew-whiff as a result.
img_9940

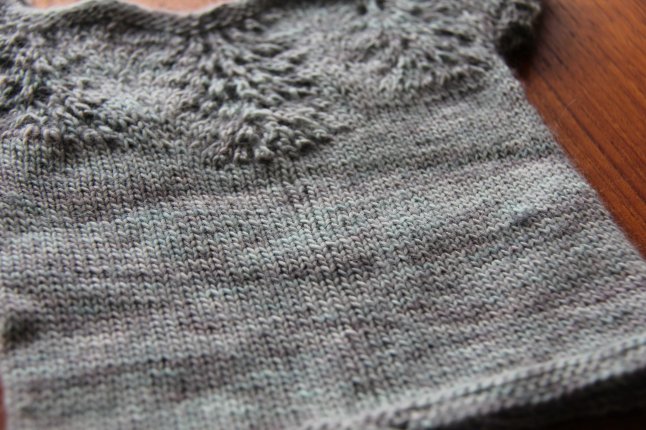
Despite a thorough blocking, there is some visible laddering due to the beginning of the round running up the middle of the back.

The second foible, which I didn’t realise until I was well underway, is that the beginning of the round is positioned in the middle of the back of the garment. This isn’t a big deal in the lacy section, but despite my very best blocking, there is a clear ladder in my stocking stitch bodice at the point where the round began. It would have been far better for this to be under an arm, out of sight.

The pattern includes instructions to use stitch markers to help keep track of the lace repeats. However, with the inclusion of various increase rows which shift the location of the markers, this involves putting the markers on only to take them off again a few rows later. While this is all very clearly described in the pattern, it’s quite a to-do and I would probably have been better just to work without the markers all together. The repeat is pretty simple so it’s not too complicated to work out where you are up to if you lose your place on a lace row.
img_9935

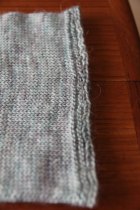
A poorly executed bind off.

The last irksome feature of my finished object is of my own doing. I initially started to cast off the bottom of the bodice using a simple chain cast off in purl, but felt that there wasn’t any stretch in it and that it might be too tight to pull onto a wriggly baby easily. So I ‘ffo-tsac’—not my favourite knitting manouvre—and instead used Jeny’s Surprisingly Stretchy Bind Off. While it is, as advertised, surprisingly stretchy, I wasn’t as even in my technique as I would like and as the beautiful stitch definition of the yarn isn’t very forgiving of poorly executed stitches, my cast off edge leaves a little to be desired. I used the same technique for the ribbed sleeve cuffs where the aesthetic issue is fortunately far less conspicuous.

So, although it’s slightly wonky looking and laddered, this is a soft and lovely lacy top which knit up very quickly for a very lovely little lady who also likes to do things in hurry.
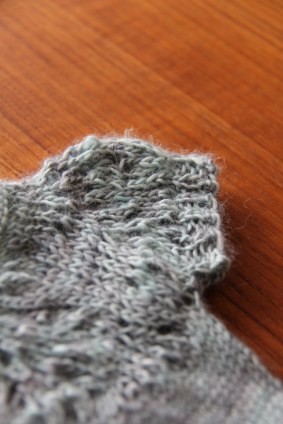
img_9936

Lovely stretchy cuffs thanks to Jeny’s Surprisingly Stretchy Bind Off.

Knitting Baby Stuff: Lessons & Lifelines

So, there’s a lot of catching up to do on the knitting I’ve been doing over the last few months.

As my due date for B.’s arrival approached, I became nervous that all that awaited him was a not-quite-half finished blanket, so put down my swaddle blanket project in favour of some quicker projects. I also realised that my own looming due date meant that the due dates of several friends expecting at the same time as me were looming too, and got further side tracked making sure there is something knit for their little bundles too. Here is what I learnt along the way.


Happy in Blue

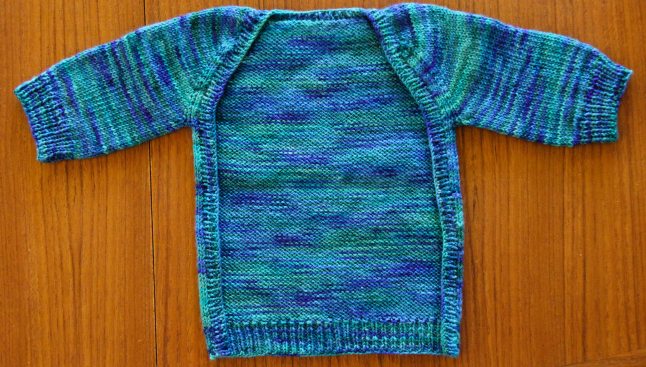
This is a gorgeous frontless cardigan from Kelly Brooker designed for newborn skin-to-skin cuddles when they are brand new and it also stays out of the high risk zone when they inevitably chuck up a tummy full of milk all over their recently donned outfit. I made one in a variegated green for a friend and having some blue yarn which didn’t quite work in its intended project, I decided to whip one up for my then baby-to-be.

IMG_7761

Happy in Blue

The issue was, according to my husband’s baking scales, I only just had enough yarn. Just. So, I needed to be very scrupulous with my measurements and not knit a row more than absolutely necessary.

I did, however, become completely engrossed in a gripping plot line on Downton Abbey and knit my cardigan too long.

IMG_7762

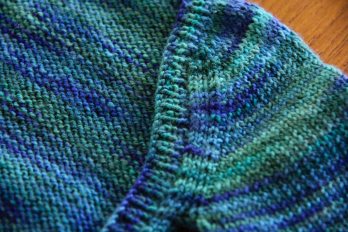
Narrow edging due to yarn shortage.

Lesson #1: Retrospective Lifelines

Needing to unpick knitting is tedious. The cautious among us ‘tink’ back through the stitches one by one. But this was several rows and I had a gripping plot line to follow. Tinking was not an option.

The fearless among us will whip the needle out and rip back the rows, trusting in their ability to rethread the needle several rows back without twisting or dropping stitches. I am not fearless.

So, I did a quick Google and found this very handy link on how to insert a retrospective lifeline. Probably not a realistic option for lace knitting—where lifelines are a must in my book—but for quickly and safely ripping stockinette stitch back, this is a gem.

Lesson #2: Calculating when to cast off

Having successfully completed the body and sleeves of the cardigan with my yarn, I knew that my collar and front border was where the compromise was going to have to be made. I needed to calculate how much yarn was required for a row, so that I knew when to call it and cast off.

To do this I measured out my yarn in arms-length sections, hooking a stitch marker through the yarn at each section, then counted how many sections I used up in kitting one row of the edging. It was not a whole number. I can’t recall how many it was exactly, but it was that many and a bit. So, when I got to having ‘that many and a bit’ of yarn left, I commenced my game of yarn chicken and started to cast off.

You can guess who won. By about 30 stitches. Turns out ‘and a bit’ is not an accurate way to measure anything. So, having avoided the dreaded ‘tink’ earlier in the piece, I proceeded to ‘ffo-tsac’, which is almost as hard to do as it is to pronounce.

The finished item looks a little weird with its skinny edging, but it still found a lovely place in my newborn’s wardrobe—albeit it short lived due to his amazing ability to stack on kilograms seemingly overnight!

IMG_7763

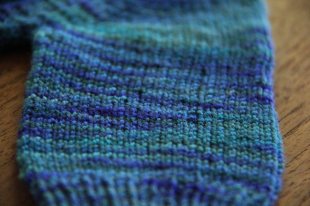
Sleeve detail

Pattern: Newborn Vertebrae by Kelly Brooker

Source: Ravelry

Price: Free! As so many of Kelly Brooker’s fabulous newborn patterns are.

Yarn: Kiogu Painter’s Palette Premium Merino (KPPPM) in Blue

Needle: 2.75mm & 3.25mm circular needles


Raspberry & Plum Lace Dress

Increasingly my knitting addiction is being closely seconded by my yarn addiction. Having spent so many years of my knitting life knitting in solid colours, I have possibly over-compensated and gone a bit wild on gradient yarn. I love the look of them both in skeins and finished objects. I bought this skein with no particular project in mind, but then thought a lovely long lace dress might be the perfect way to show it off.


IMG_7748

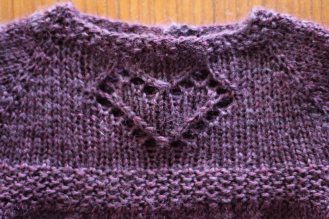
Sweet heart detail.

Lesson #3: Knit a gauge swatch …and then use the information it gives you

The issue with gradient yarn is the maximum effect of the beautiful colour gradient is only achieved if you manage to find a project that uses up exactly one skein of yarn. No more. No less. This is a challenge where the length isn’t very flexible, or where a losing a game of yarn chicken is going to be difficult to face. I don’t like to play yarn chicken with a 14 row lace repeat. Throw in the need to do a different 13 row repeat for the last one and, well, I’m not game.

So, despite actually knitting a gauge swatch (see the perils of failing to do so here), I was so fearful of running out of my gradient that I convinced myself that a superwash yarn would stretch a lot with blocking (information I had no reason to actually believe!) and knit the dress using needles I knew would give me a smaller dress than required.

I did plan to play it a little by ear and add extra length if I found I had loads of extra yarn, but my yarn chicken phobia got the better of me and I pulled out of the lace repeats a touch early and missed out on the full beauty of this vampy gradient from Knit Circus as the brilliant hot pink finish did not make it onto the finished object.

When will I finally learn the gauge swatch lesson?!

Lesson #4: Lace Lifelines & Place Markers

This is probably something that lace knitters across the world would roll their eyes at with a collective sigh of ‘Well, duh!’, but it didn’t really cross my mind as a diligently thread myself a lifeline after my first lace repeat. I thread my lifeline through all my stitches and my place markers.

But a few rows on, I realised my error. The lifeline was pulling down with the markers. Not good. I rethread my lifeline skipping the markers as I went and ended up with what I was looking for. A little bit of lace insurance.

IMG_7750Pattern: Helen Joyce Dress by Taiga Hilliard Designs

Source: PDF download from Ravelry

Price: $6.50 USD

Yarn: KnitCircus Corriedale Sock in Vampire Boyfriend

Needle: 3.5mm circular… should have gone bigger.


*


IMG_7752

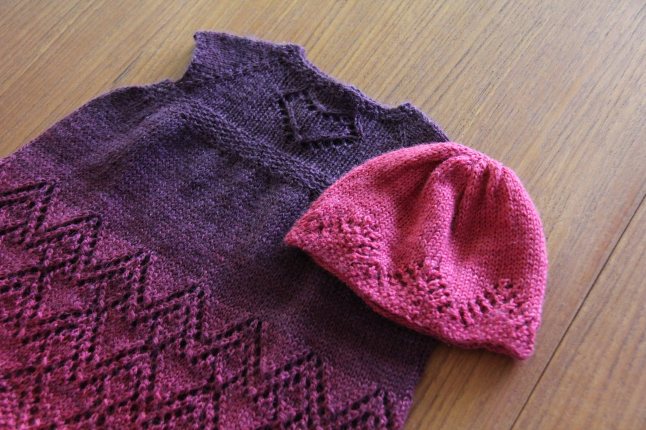
Matching hat of my own (plagaristic) design made from the delicious hot pink end of the gradient that didn’t quite make it to the main event.

So, despite aggressive blocking,  I ended up with a rather stumpy looking dress. Turns out superwash does not have ridiculous stretch properties. Who knew?!

Despite its shortcomings, my Raspberry & Plum dress found a very happy home. And the mother of its recipient assures me it’s not too ‘goth’ for her gorgeous baby girl.

And I even managed to knit up a matching beanie from the remaining yarn by modifying a newborn beanie pattern and adding the Helen Joyce lace detail to the edge.


Knitting Baby Stuff: From Frogs Legs to Loopy Leggings

I’m back!

There’s been a lengthy silence on this blog due to many factors—mostly the arrival of a gorgeous B at the beginning of April—but I’ve never stopped knitting! So we have some catching up to do.

File 9-04-2016 11 49 49 am

Master B. joined our family in April.

These scrumptious leggings were finished before B. arrived, but the weather is only just starting to cool down now and we finally got them on to W for a few photos this morning.

IMG_8695

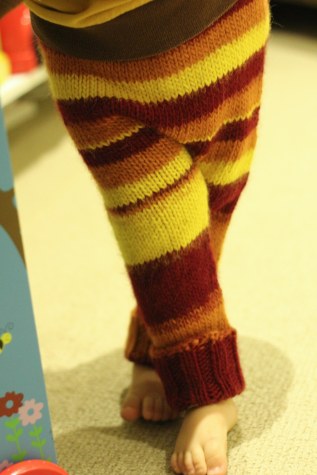
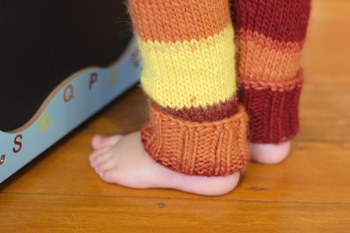
Loopy Leggings modelled by W. highlighting the self-striping rookie error of the leg rejoin.

They didn’t start out so fabulous. Yet again, I failed to swatch (who has time, right?) and then I failed to convert US needle sizes correctly, so used a 6mm needle instead of a 5mm needle for the main knitting. I also failed to measure my child and guessed at a size.

By the time I reached the gusset, I realised I had knit a ginormous pair of pantaloons that could have just about fit me!!

Frogged. Whole process taking far, far longer than it would have to (a) swatch and (b) measure my intended wearer.

So, armed with a needle conversion chart printed and popped into my knitting organiser for future reference, and my measurements, I cast on again. This time, a gauge swatch!

After sorting out my gauge, I got on with it and turned out this lovely pair of leggings. Only hitch being that the yarn is a little scratchy on delicate toddler skin. A thin pair of cotton leggings underneath sorted that out and he’s played happily in them all morning.

Pattern: Lamby Leggings by Sarah Lehto

Source: Ravelry (of course!)

Price: $6 USD

Yarn: Plymouth Yarn Pasea in 1017 (self-striping in red, orange & yellow)

Needle: Would you know after all that I didn’t write it down? Can’t remember what I ended up using! But you’ll be doing your own gauge swatch, right?

IMG_8691

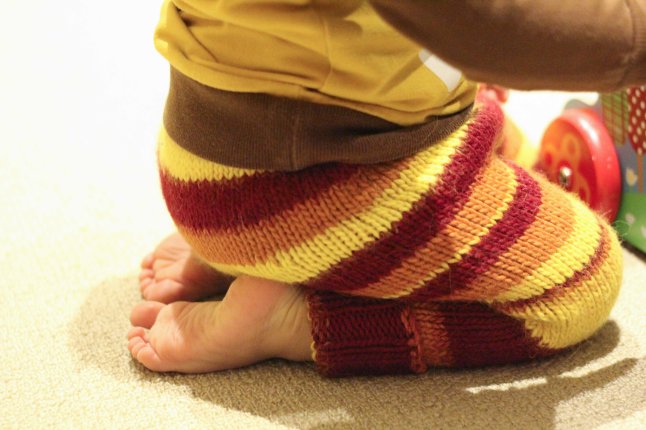
Designed with plenty of room for W’s cloth nappied bottom. They might sag a little sadly over a a slimline disposable.

The pattern is very well written, including photographs to help with some of the less common techniques, such as the double bum short rows. I still struggled a little with getting this to work, but I think that is more my issue than the author’s!

I did spot a few errors—the most costly of which was the instruction in the gusset to ‘repeat gusset increase round 7 times’. This should read ‘repeat gusset increase a total of 7 times’. I repeated it 7 times (after I’d done it the first time, making a total of 8 times) and ended up with 4 more stitches than I should have. Tink tink.

I also ran into issues when I used a knit front & back (KFKB) technique for my increases in the increase round immediately below the waistband. I failed to subtract the stitch I used for the KFKB from the stitch count between the increases, and ran out of stitches prior to the end of the round. Again, my issue rather than the author’s! If I’d used a ‘make one’ technique of picking up the loop between stitches—as implied by the instructions—all would have been fine!

IMG_8703

I knit them a bit long to allow for upcoming growth spurts. The cuff looks cute folded up in the meantime.

My other main failing was due to a lack of finesse in using a self-striping yarn. I should have rejoined for the legs ensuring that the rejoin was the same colour on both legs and ideally the same as the colour joining them on the gusset. I didn’t do either of these things, so there’s a small odd stripe on one thigh and a huge thick stripe on the other. And the legs are not the same. But, hey, they are loopy leggings!

Knitting Baby Stuff: Two Tone Tidbits

In recent times, I am increasingly becoming guilty of the knitter’s vice of buying yarn for which I have no particular purpose. I find it difficult to wander around a yarn shop without buying a skein or two. I am often drawn to hand dyed and handspun yarn which then sits unused in my front room as I’ve no idea what to make with it!

So in an attempt to compensate for this guilty pleasure, I decided my next baby knit was not allowed to result in buying yet more yarn. The answer was this perfect stash buster from Kelly Brooker. It is particularly fabulous for using up those little tidbits left over from bigger projects.

Pattern: Tidbit by Kelly Brooker

Source: Ravelry download

Price: Free!!

Yarn: Leftover 8ply scraps (various)

Needle: 3.5mm & 4mm short circular and/or DPNs

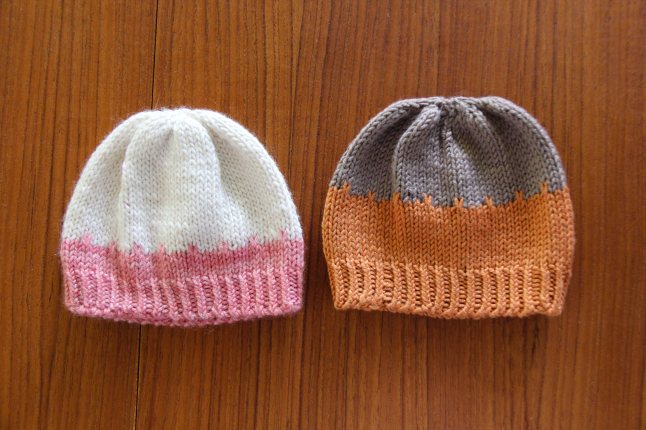
This is a beautifully simple knit and the pattern detail is very clever in that you don’t need to anticipate your yarn scrap running out as the pattern is achieved by simply slipping the stitches in the first colour for the first two rows of the second colour… no remaining yarn required! It is also brilliant in that the thickness of the band of the first colour can vary without any adverse effect on the aesthetic of the finished project. Absolutely ideal for using up random scraps of leftovers.

I have made two so far. One for my little man due in a few months and one for a little girl a friend is expecting around the same time. I’m very happy with them both and suspect there’s a few more to come given the large bag of leftover 8ply scraps I have accumulated!

IMG_7753

My Two Tone Tidbits from leftover 8ply stash scraps. The thickness of the band of the first colour determined largely by how much of it I had left!

Knitting Baby Stuff: Raspberries & Cream

IMG_7039

Quaintly in DK weight yarn.

At risk of sounding like a broken record, I love Pekapeka patterns!

I had two little one-year-olds to knit for this year. The Little Boy Blue went down a treat and I’m hoping this girly knit is also a hit with the gorgeous Miss L as she celebrates her first year on this wild planet.

This gorgeous wild raspberry variegated skein from Gradient Aus had been sitting in my stash for a while and so I was delighted to discover this larger version of my old favourite, Composite, required just the right amount of delicious pink yarn to make the 12-18 month size.

IMG_7043

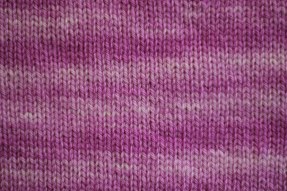
My last variegated knit with expanses of stocking stitch. Not a big fan of the smudge effect.

Pattern: Quaintly – DK

Source: Ravelry download from Pekapeka

Price: $5 USD

Yarn: Wild Raspberry from Gradient Aus (100g)

Needle: 3.5mm & 4.0mm circular needles

As for her Composite pattern, Kelly Brooker again has very clear and detailed instructions which make it difficult to go wrong. I used the charts to knit the lace sleeves (something I am still learning how to do well) and apart from one slight error, which would only be noticed on exceedingly close inspection of the capped sleeves, I managed to knit this while watching The Killing with subtitles. Though, I suspect I may have missed less crucial parts of the dialogue.

IMG_7058

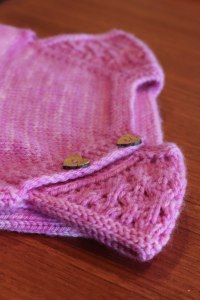
The button band is written to be sewn together except for the top button. I’ve left it open so a large baby head can fit through without tears.

The button band is designed to only open at the top button and the remainder of it is supposed to be sewn down, however I left it open to allow for easy dressing. As the mother of a baby with an exceedingly large head, I am acutely aware of the issue of small necklines and I didn’t want to gift a garment that induced crying at every wear! If I’d noticed the mock button band in advance, I would have planned to pop and extra real button hole in. Hoping it doesn’t gape strangely when on.

Despite the gorgeous vibrant colour of this yarn, I think this is probably my last variegated project using big sections of stocking stitch. I’m not the biggest fan of the smudge look and have already been investigating other ways to use variegated yarn. Excited to try a linen stitch scarf and some cool socks, both waiting in my Ravelry queue as experiments in alternatives.

But first to finish that previously frogged nemesis knit.

Knitting Baby Stuff: Lace & Simplicity

In the madness of life with an 8-month-old baby and a often busy work life, time got away from me and I completely failed to have a knit ready for the arrival of a friend’s baby girl last week. With no time to order yarn online or get to the yarn shop, I rummaged through my stash and my pattern books and decided on making this gorgeous knit again.

IMG_5732

Simple cap sleeve top with button. I didn’t oversew the button band as advised in the pattern as I had a baby with a massive head and know that neck opening just ain’t big enough for some heads.

I’ve made it once before and been very pleased with it on both occasions. With a little dedication to the cause, I managed to get it finished within a few days and once it’s finished blocking, will get it off in the post on Monday.

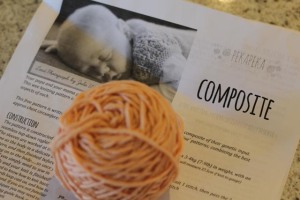
IMG_5738Pattern: Composite by Kelly Brooker of Pekapeka Design Studio (she also wrote this pattern… another go to favourite for new arrivals.)

Source: Ravelry

Price: Free!!

Yarn: Stash scraps – Sublime Cashmere Merino Silk DK. I think. Lost the ball band.

Needles: 80cm 3.5mm circular and 30cm 4mm circular – from different sets so they’re easy to tell apart.

This pattern knits up surprisingly quickly and is very pretty with little lace cap sleeves. Given the size, the concentration for the lace is only required for 13 rows so it’s still a suitable in-front-of-the-telly knit, though you may want to watch something not too challenging during the lace rows. There’s a slightly tricky section where you use both the small and large needles simultaneously, which Kelly describes in the pattern as being “a bit like playing with an octopus”, but as she also points out, it only lasts a few rows so it’s manageable.

IMG_5734

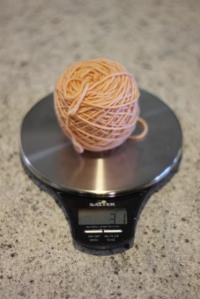
Weighing up my chances of finishing the knit with yarn to spare.

I particularly liked that Kelly specified the weight of yarn required for the knit. This meant that by temporarily borrowing my husband’s baking scales I could work out whether I had enough yarn even though I was using pre-wound stash scraps which had been half used.

Pearls:

  • Weighing yarn is a great way to work out how much of a ball you have left and whether you’re likely to finish the project on your scraps
  • Lacework requires concentration, even when simple, so avoid watching anything too in-depth or challenging during those 13 rows!
  • The pattern calls for oversewing of the button band to join the two layers. I didn’t do this, as the button allows for the neck opening to fit over baby’s head and as the mother of a particularly large headed baby (greater than the 98th centile… no seriously, a lot greater!!) I know how frustrating a small neck opening can be.
  • This knits up quite small, but after blocking should be right to fit a baby for their first few months in this crazy world.
  • In writing this post, I’ve discovered the Pekapeka Design Studio page with a bunch of gorgeous free patterns to choose from! You can find them here!

Knitting: A Silly Hat for the Silly Season

Having spent the last 12 months as a research fellow and then on unpaid maternity leave, my knitting projects have taken a slightly frugal turn and are, for the most part, directed at using up my current (rather excessive) yarn stash rather than buying new yarn. This has led to some fairly unsuccessful knits (e.g. 3/4 of a stripy sock aborted as I can’t for the life of me work out how to get the stripes to match up around the heel… of course rather insanely trying to knit from a pattern not written for stripes), but this little number is a winner.

Albeit rather silly and completely useless beyond the next week or two.

Pattern: Not Only Christmas Hat by Anna Rauf

Source: Ravelry

Price: Free!!

Yarn: Sublime Cashmerino Silk DK (scraps from stash)

Needles: 3.5mm and 4mm 41cm circulars; 4mm double pointed needles for when the circulars get too big.

IMG_4608

Having a son with an abnormally large head (yes, yes, it’s off the charts in his little Blue Book), I diligently measured his head prior to starting this knit (46cm! Lordy!) in the XS size (41 – 46cm). Despite that, a short way in, I checked the knit by trying to squeeze it on to him and the result was fairly instantaneous crying. Bad mum. So, I unravelled and ended up knitting the M size instead (48 – 54cm) and it fits without crying… just. So, I’d suggest measuring your intended hat wearer and going up a size (or two).

I also didn’t knit the tail of the hat as long as the pattern called for. My tail is about 11cm long, partly due to my stash running short and partly to avoid the tail being sucked and chewed on my the wearer. My pompom could probably not withstand the attack of slobber that would eventuate if W could see or reach it!

Pompoms are something I am no expert in and I find it hard to get them tied tight enough. The result is a pompom that is prone to shedding if pulled. Not ideal. This might also be because of the silk in the yarn making it a little extra slippery. If anyone has good pompom technique tips, please post in comments! I’m all ears!

Knitting Baby Stuff: Newborn Cardigans

Pattern: Puerperium Cardigan by Kelly Brooker

Source: Ravelry

Price of pattern: Free!

Yarn: Debbie Bliss Baby Cashmerino & Sublime Baby Cashmere Merino Silk DK

This pattern is a firm favourite and I have just finished up my 5th incarnation! It’s a very simple knit (even simpler if done as a short-sleeved version to avoid the tedium of knitting in the round on double-pointed needles for the long-sleeves) and in the right yarn and button combination can suit boys or girls.

For W, I made a long-sleeved from a Debbie Bliss Baby Cashmerino – which is less than 8ply – which worked very well, though was a looser knit, and a short-sleeved in Sublime Baby Cashmere Merino Silk DK.

I’m now finishing up a short-sleeved one in red for a friend who is expecting a little boy next month… but I’ve made a dud button choice (too girly) so will be heading back to the Button Bar for a rethink.

Pearls:

  • If you are put off by the call for double-pointed needles, make the short-sleeve version. It requires only 4 rows of garter stitch on your DPNs. The pain is over in no time.
  • This is knit from the neck down… knowing this helps to get your bearings!

    IMG_3651

    Puerperium Cardigan in Debbie Bliss Baby Cashmerino